Background:
For many who are new to CI/CD and starting with GitHub Actions, the most significant challenge is quickly understanding the variety of resources and concepts within Kubernetes (k8s).
Questions like "What is deployments, ingress, service?" and "What's the difference between a container and a container image?" may initially seem daunting.
This presentation is beginner-friendly ! I will explain everything in the simplest terms or metaphor to ensure it's easy to understand. Let's dive in.
I. The concept of Kubernetes (k8s) & its overall architecture.
Use one sentence to summarize:
It's a system for automating the deployment, scaling, and management of containerized apps.
But, what does that really mean?
Picture this:

you've got a bunch of apps or services that need to run, and they often need attention—like starting, stopping, or updating. You don't want to do this manually every single time, right?
This is where Kubernetes really shines! You can think of it as an automated army of robots to manage your applications.
First, I will briefly introduce the basic concept of Kubernetes (k8s):
1. The most fundamental concept: container
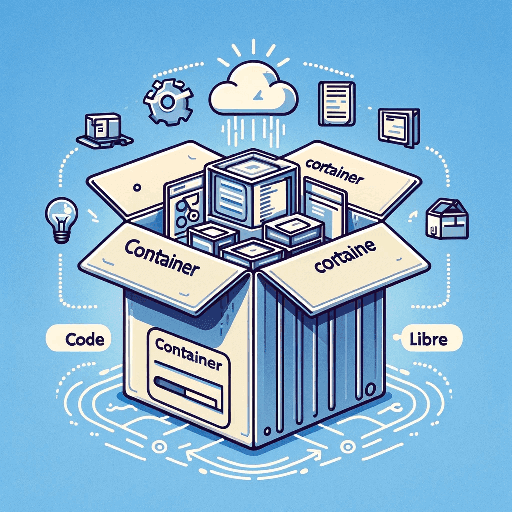
Simply put, a container is like a lightweight, encapsulated software package that contains everything needed to run an application: code, runtime environment, libraries, and even system settings. It's like packing your application into a portable box that can run anywhere.
Then, k8s comes in to manage these boxes. It ensures that the containers run in the right places and automatically adjusts their numbers as needed (this is what is called scaling).
For instance, if the number of users of your application suddenly increases, k8s can automatically strengthen support by adding more containers to share the load. Conversely, if the number of users decreases, it will reduce the number of containers accordingly.
Second. Introduce the core architecture of K8s:
- Master Node: This is the brain of the entire k8s system. It decides where the containers should run and when to scale them.
- Worker Node: These are the nodes that do the actual work, running your containers. They are managed by the Master node. worker node carry Pods.
- Container: This is the smallest unit in k8s. it's simplest running unit of an application.
- Pod: You can think of it as a home for containers. Usually, a Pod runs a single container, but sometimes multiple closely related containers may share a Pod.
- Ingress: Ingress is an API object that manages the rules for external access to your applications, such as routing HTTP traffic.
- Service: This defines how a group of Pods can be accessed. It allows users to find and connect to the right Pods. it provides Pods with a fixed IP address and DNS name, even if the location of the Pods changes.
Difference between Ingress and Service
- If we compare pods to houses, Ingress is like a public highway leading into a neighborhood. It manages and directs external traffic coming from outside the cluster to the appropriate Services within the cluster.
- Service is like the internal GPS mapping service. It ensures that anyone who wants to visit a house (Pod) can find it easily, even if the house moves locations.
- Deployment: This helps you manage Pods and ensures that the specified number of Pods are always running. For example, if a Pod fails, Deployment will automatically create a new Pod to replace it.
These components work together to enable Kubernetes !
If you find it difficult to grasp so many concepts all at once, never mind. you will quickly understand them in the third (Using kubectl to operate resources and view these resources in Rancher) part.
II. Understanding Common Kubernetes Resources
Now, I'll introduce common Kubernetes resources. Understanding these will prevent you from feeling lost when writing most CI jobs, as the resources you'll encounter in work mostly fall within this scope.

- Container: The smallest unit of an application
- Workload: Refers to the collection of applications running on the cluster
- Networking: Relates to handling network traffic
- Storage: Refers to data storage
- Config: Means configuration
Now I will introduce each category below:
1. Containers and Pods
- Container: The smallest deployable unit in a Kubernetes application, similar to a single process in a traditional operating system.
- Container Image: A self-contained package with all software components to run in a container.
- Container Instance: An instance of an image that runs as an isolated process.
their relationship is a bit like cookie mould and cookie:

2. Workload
2.1. Pod:
A group of one or more containers, with shared storage/network, and a specification on how to run the containers. A Pod is a house of containers.
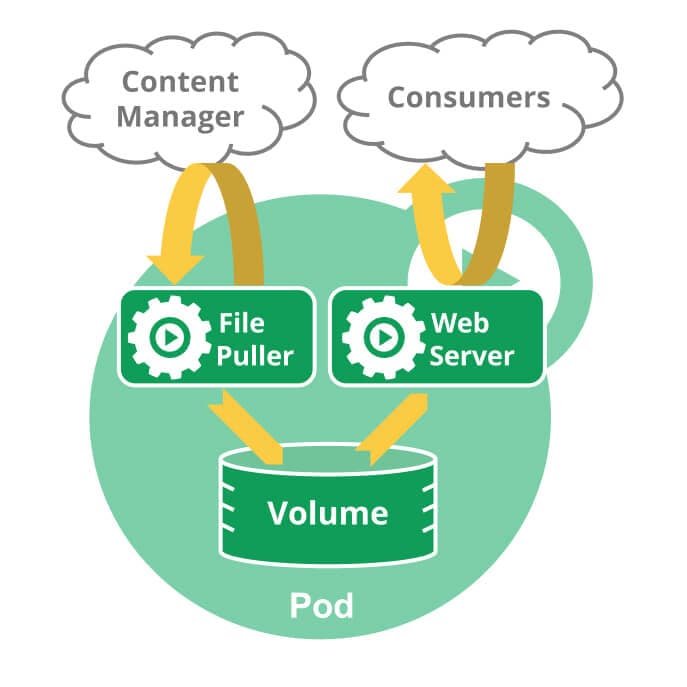
A multi-container Pod that contains a file puller and a web server, uses a persistent volume for shared storage between the containers.
Key points to remember about Pods:
- Containers within a Pod share the same IP address and can communicate using
localhost. - Kubernetes can automatically manage the lifecycle of Pods, restarting or replacing them as necessary.
2.2. ReplicaSet
A ReplicaSet in Kubernetes ensures a specified number of identical Pods are always running. It helps ensure that there are enough instances at any given time to handle the load of the application.
How a ReplicaSet Works:
A ReplicaSet is defined with three factors
- Selector: This is a rule that tells the ReplicaSet which Pods to manage
- Number of Replicas: This tells the ReplicaSet how many identical Pods you want it to maintain.
- Pod Template: This is a blueprint that instructs the ReplicaSet on what a new Pod should look like if it needs to create one to meet the replica count requirement.
Once a ReplicaSet is defined, it creates or deletes Pods. If more Pods are needed, it creates new ones based on the Pod template you provided.
If I were to give an analogy: the ReplicaSet acts like a manager, ensuring that the specific number of Pods you want is always running, not more, not less.

2.3. Deployment

A Deployment provides declarative updates for Pods and ReplicaSets. it’s like a blueprint in cluster. Deployment will be the concept you deal with the most.
Core Concepts of Deployment:
-
Declarative Pod and ReplicaSet Updates::
-
Deployments allow you to define the desired state of Pods and ReplicaSets in a configuration file (YAML). This includes a range of specified parameters and configurations, such as the number of Pod replicas, container images, update strategies, and more.
-
The Deployment Controller(a component in Kubernetes usally running on master node) then changes the actual state to match this desired state
-
-
Automated Rollouts and Rollbacks: Deployments automate the process of updating Pods.
- When you make changes to the Deployment configuration, Kubernetes automatically rolls out these changes incrementally while ensuring a specified number of Pods are running.
- If something goes wrong, Kubernetes can automatically roll back to the previous configuration. We often encounter this scenario when writing CI.
-
State Tracking: Deployment status, such as the number of running replicas and update status, can be monitored via the Kubernetes API.
-
Self-healing: Deployments provide self-healing by replacing Pods that fail, become unresponsive, or do not meet the user-defined health check.
-
Scalability: Deployments make it easy to scale up or down the number of Pods as required. You can change the number of replicas in the Deployment configuration, and Kubernetes will adjust the number of Pods to match.
2.4. Job and CronJob
Job and CronJob are resource types used for task execution in Kubernetes. Their core concepts are:
- Job:
- A Job is responsible for creating a Pod to execute one or more tasks until a certain number of successful completions.
- Its primary purpose is to execute tasks that need to be terminated, such as batch jobs and data processing tasks.
- Once the task is complete, the Job stops the Pod from running but does not delete the Pods. This allows you to check the Pod logs and status to understand how the Job performed.
- Jobs are suitable for tasks that need to be executed only once.
- CronJob:
- A CronJob is a type of Job that executes tasks at scheduled times.
- It is suitable for tasks that need to be performed periodically, such as cleanups and sending email reports.
3. Networking: Ingress and Service
3.1. Ingress
manages the rules for external access to your cluster, acting as a router or HTTP proxy.
Here is a simple example where an Ingress sends all its traffic to one Service:
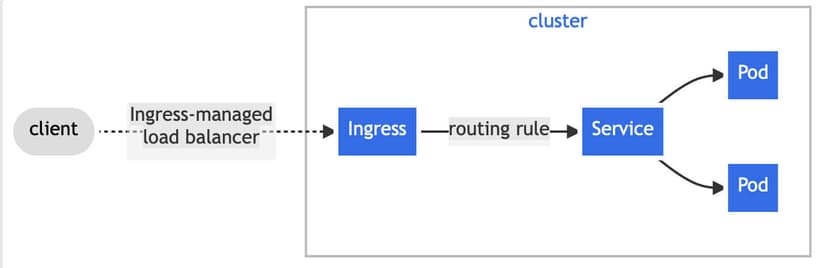
The core concepts of ingress are:
-
Traffic Routing: It allows you to define rules for routing HTTP and HTTPS traffic to specific services based on hostnames or paths.
-
Host and Path-Based Routing: Ingress can route traffic based on hostnames (like
www.example.com) and paths (like/app1,/app2). This means different requests to the same IP can be served by different services based on their URLs. -
Load Balancing: It provides load balancing, Ingress helps distribute incoming network traffic efficiently across multiple backend services.
3.2. Service

- official defination:In Kubernetes, a Service is a method for exposing a network application that is running as one or more Pods in your cluster.
- metaphor: Internal GPS mapping service. It ensures that anyone who wants to visit a house (Pod) can find it easily.
Why do we need service ?
If you use a Deployment to run your app, that Deployment can create and destroy Pods dynamically. From one moment to the next.
you don't know how many of those Pods are working and healthy; you might not even know what those healthy Pods are named.
Each Pod gets its own IP address. For a given Deployment in your cluster, the set of Pods running in one moment in time could be different from the set of Pods running that application a moment later.
This leads to a problem: if some set of Pods (call them "backends") provides functionality to other Pods (call them "frontends") inside your cluster, how do the frontends find out and keep track of which IP address to connect to, so that the frontend can use the backend part of the workload?
The Service help you expose groups of Pods over a network. Each Service object defines a virtual IP. When a request arrives at the Service's Cluster IP address and port, the Kubernetes control plane routes the request to a set of real Pod IP addresses . This process includes load balancing and request routing to ensure the request is correctly delivered to the target Pod.
4. Storage: Volume and Secrets
4.1. Volume
Volumes provide a way to separate data storage from the container lifecycle, allowing containers to still access their data when they are restarted, rescheduled, or migrated.
The most common type of Kubernetes Volume are PersistentVolume (PV).
you can use persistent volume to store your data on remote storage devices accessible over a network, rather than on local hard drives.
4.2. Secret
Secrets are used for managing and storing sensitive information, such as passwords, OAuth tokens, SSH keys. They prevent sensitive data from being stored in plain text within the Pod spec.
Kubernetes uses Secrets in two ways:
- As Environment Variables:
- Data in Secrets can be passed as environment variables to containers within Pods. This allows containers to access sensitive data at runtime without hard-coding it in application code or Docker images.
- You can specify individual environment variables for each container in a Pod, referencing the data stored in Secrets.
- As Volume Mounts:
- Secrets can also be mounted as volumes into the Pod's file system. With this approach, data from Secrets is written into one or more files, which are then mounted at a specified path within the Pod.
- This method is particularly useful for applications that need to read configuration or keys from files, such as configuration files or certificates.
III. Getting started right now → Using kubectl to Operate Resources and View These Resources in Rancher
Now that we have understood the basic concepts, next, we will deploy a real application, First, you need to understand the concepts of kubectl and Rancher:
- kubectl: the command-line tool that lets you control Kubernetes clusters.
- Rancher: rancheris an open-source platform for managing Kubernetes, offering a UI for Kubernetes (k8s) environments.
Note: Although Rancher provides a convenient UI, mastering kubectl is crucial for direct cluster management and debugging. Sometimes, Rancher might not display all the necessary information for troubleshooting.
Follow command to run through and you will have a deep understanding of kubectl and rancher:
1. Connecting to a Kubernetes Playground with kubectl
A "Playground" refers to a Kubernetes environment set up for learning and testing. It allows users to experiment with Kubernetes features without affecting production environments. In the following examples, the playground namespace is 'myspace'.
I assume that you already have a deployed k8s cluster and Rancher platform. First, visit your playground platform in your Rancher, and download your kubeconfig file from the top right corner of the page.
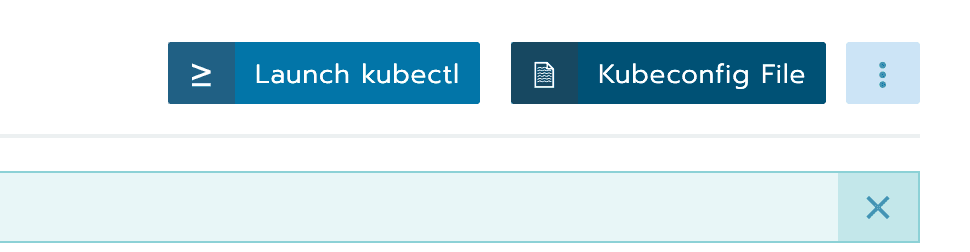
Then, store it in ~/.kube/config in your home directory.
This file is what enabling kubectl to interact with the cluster.
2. Let’s start with the basics – see everything in your namespace, like all your Deployments, Services, and Pods?
-
To view all resources in your namespace (Deployments, Services, Pods, etc.):
kubectl get all -n myspace -
If you think it’s too much and you just want to see all the pods
kubectl get pods -n myspace
You will get a lot of pod information. Taking myspace-docker-5cdf45c5f6-nbvxk 1/1 Running 0 148m as an example, I will explain the information in each column:"
-
1/1: This represents the current number of replicas of the Pod. In this example
-
Running: This indicates the Pod's status.
-
0: This is the current restart count of the Pod. If the container fails and restarts, this count would increase.
-
148m: This is the duration of time the Pod has been running. In this example, it's 148 minutes.
3. let's dive into how to use kubectl to create a stateless application, the application has this features:
- Run five instances of a Hello World application. which will print ‘hello world’.
- Create a Service object that exposes an external IP address. Use the Service object to access the running application.
3.1. Create a deployment with the following YAML (load-balancer-example.yaml):
# load-balancer-example.yaml
# Define API version and resource type
apiVersion: apps/v1
kind: Deployment

# Metadata section, including labels and resource name
metadata:
  labels:
    app.kubernetes.io/name: load-balancer-example  # Define the application label
  name: hello-world  # Define the name of the Deployment resource

# Deployment specification, including replica count and selector
spec:
  replicas: 5  # Define the number of Pod replicas to create
  selector:
    matchLabels:
      app.kubernetes.io/name: load-balancer-example  # Selector to match Pods

  # Pod template section, including labels and container definition
  template:
    metadata:
      labels:
        app.kubernetes.io/name: load-balancer-example  # Define the Pod label

    # Container definition, including image, container name, and port configuration
    spec:
      containers:
      - image: gcr.io/google-samples/node-hello:1.0  # Container image to use
        name: hello-world  # Define the name of the container
        ports:
        - containerPort: 8080  # Port that the container listens on
3.2. Apply the deployment:
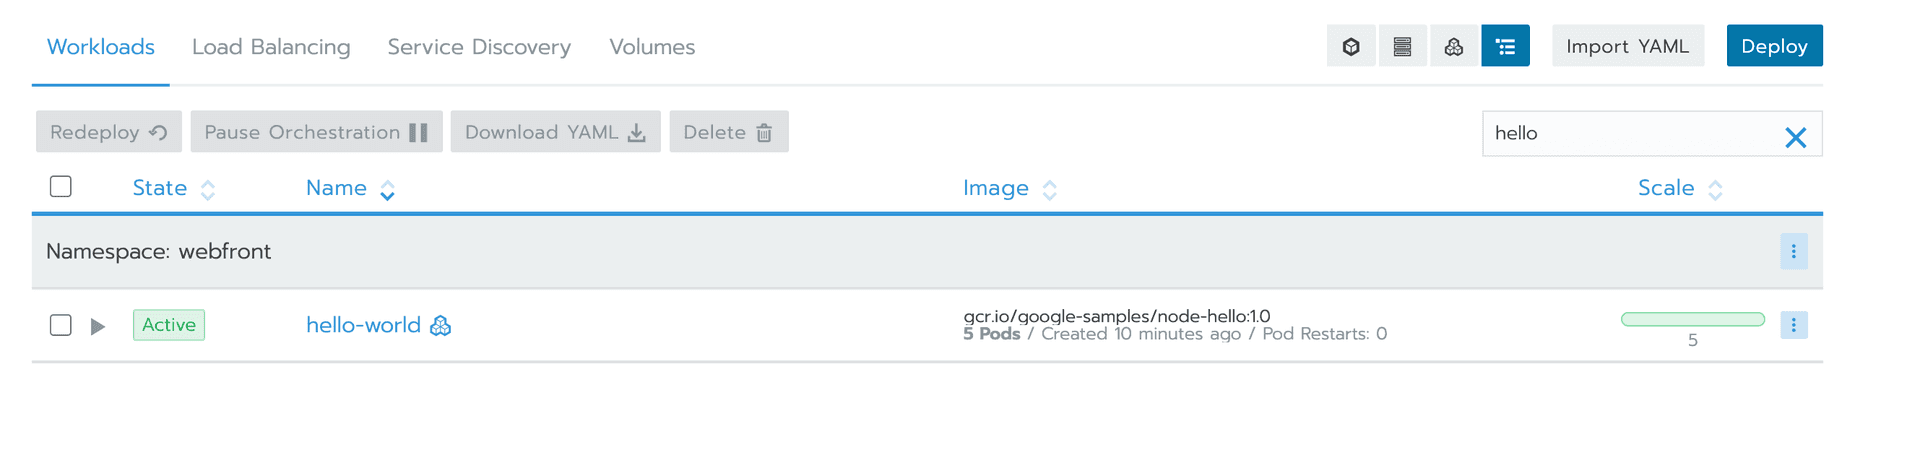
kubectl apply -f load-balancer-example.yaml -n myspaceThe preceding command creates a Deployment and an associated ReplicaSet. The ReplicaSet has five Pods each of which runs the Hello World application.

Then we will see the creation result on Rancher:
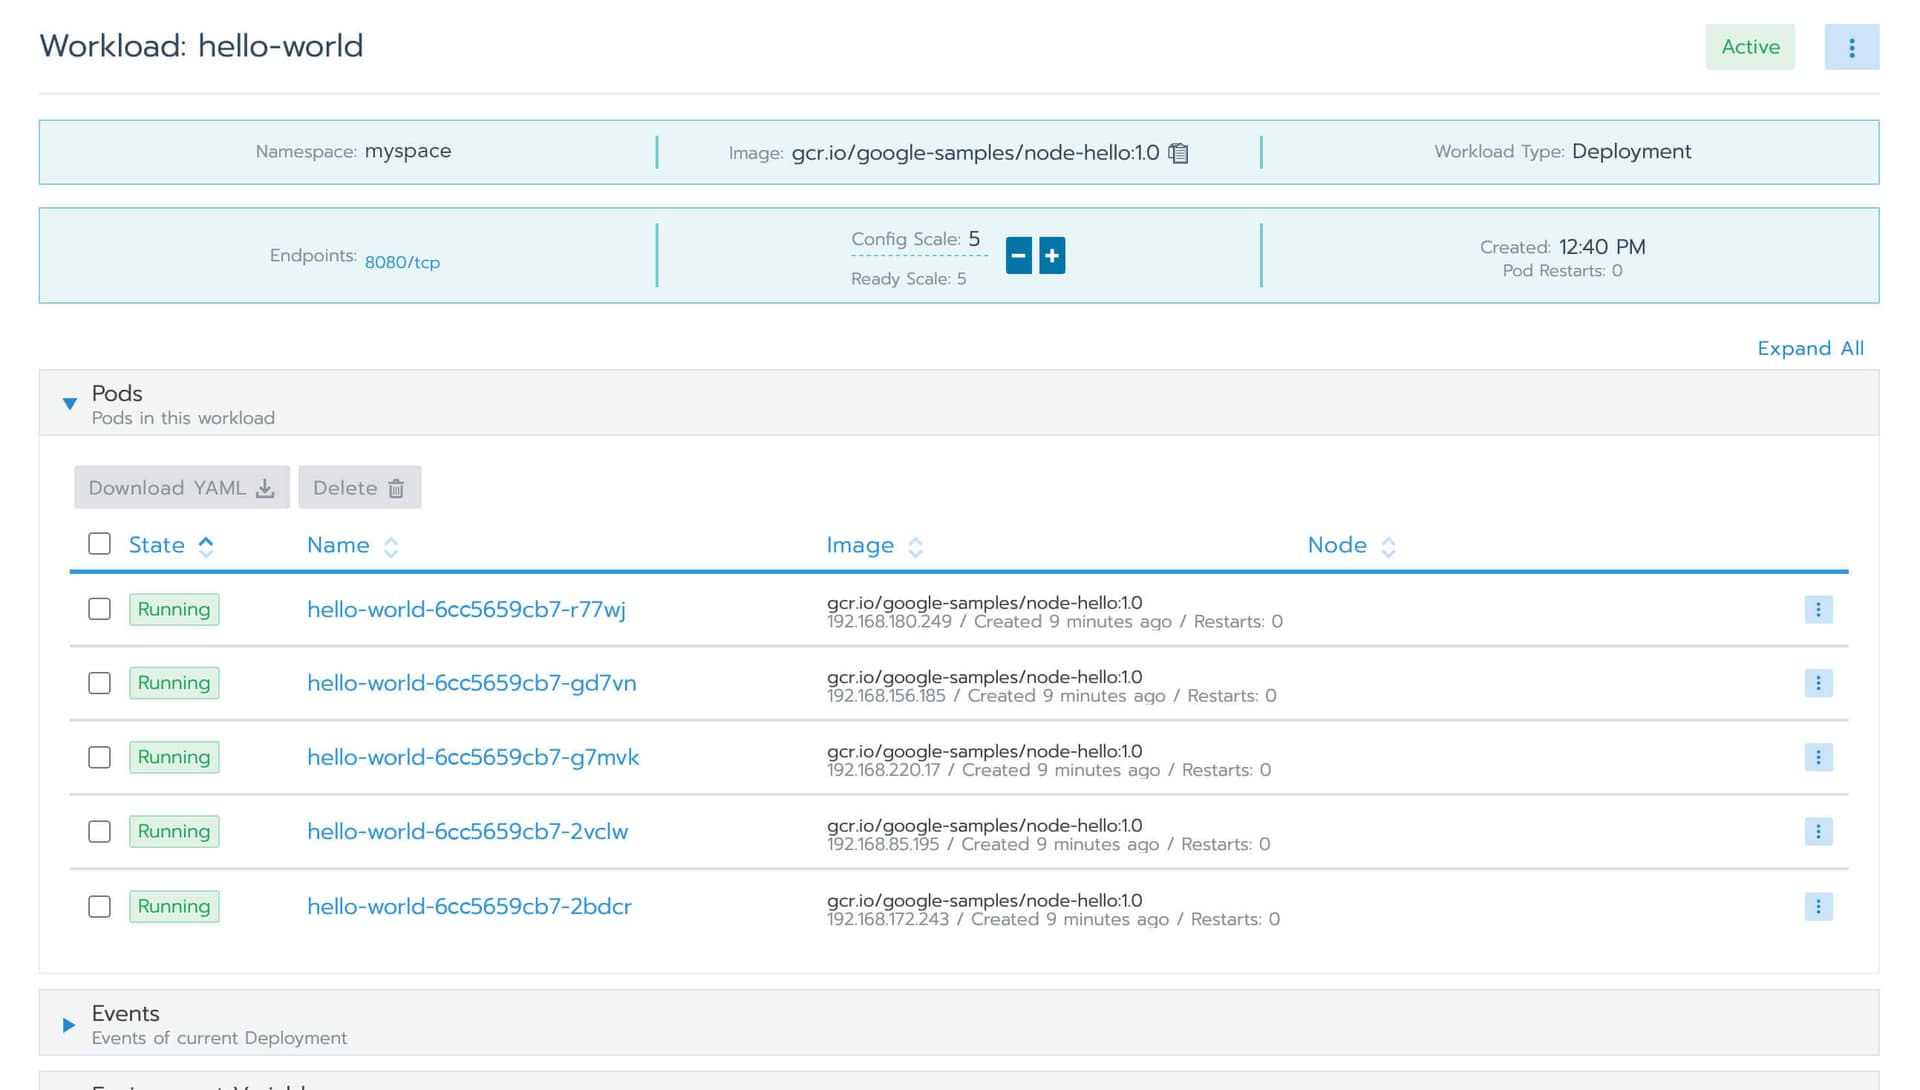
3.3. Display information about the Deployment:
Use this command to display the information about your deployment:
kubectl describe deployments hello-world -n myspaceYou will see information as belows:
Name:                   hello-world
Namespace:              myspace
CreationTimestamp:      Fri, 17 Nov 2023 12:40:21 +0800
Labels:                 app.kubernetes.io/name=load-balancer-example
Annotations:            deployment.kubernetes.io/revision: 1
Selector:               app.kubernetes.io/name=load-balancer-example
Replicas:               5 desired | 5 updated | 5 total | 4 available | 1 unavailable
StrategyType:           RollingUpdate
MinReadySeconds:        0
RollingUpdateStrategy:  25% max unavailable, 25% max surge
Pod Template:
  Labels:  app.kubernetes.io/name=load-balancer-example
  Containers:
  hello-world:
    Image:        gcr.io/google-samples/node-hello:1.0
    Port:         8080/TCP
    Host Port:    0/TCP
    Environment:  <none>
    Mounts:       <none>
  Volumes:        <none>
Conditions:
  Type           Status  Reason
  ----           ------  ------
  Available      True    MinimumReplicasAvailable
  Progressing    True    ReplicaSetUpdated
OldReplicaSets:  <none>
NewReplicaSet:   hello-world-6cc5659cb7 (5/5 replicas created)
Events:
  Type    Reason             Age   From                   Message
  ----    ------             ----  ----                   -------
  Normal  ScalingReplicaSet  35s   deployment-controller  Scaled up replica set hello-world-6cc5659cb7 to 5
you can also display information about your ReplicaSet objects:
kubectl describe replicasets hello-world -n myspaceOutput example:
Name:           hello-world-6cc5659cb7
Namespace:      myspace
Selector:       app.kubernetes.io/name=load-balancer-example,pod-template-hash=6cc5659cb7
Labels:         app.kubernetes.io/name=load-balancer-example
                pod-template-hash=6cc5659cb7
Annotations:    deployment.kubernetes.io/desired-replicas: 5
                deployment.kubernetes.io/max-replicas: 7
                deployment.kubernetes.io/revision: 1
Controlled By:  Deployment/hello-world
Replicas:       5 current / 5 desired
Pods Status:    5 Running / 0 Waiting / 0 Succeeded / 0 Failed
Pod Template:
  Labels:  app.kubernetes.io/name=load-balancer-example
          pod-template-hash=6cc5659cb7
  Containers:
  hello-world:
    Image:        gcr.io/google-samples/node-hello:1.0
    Port:         8080/TCP
    Host Port:    0/TCP
    Environment:  <none>
    Mounts:       <none>
  Volumes:        <none>
Events:
  Type    Reason            Age   From                   Message
  ----    ------            ----  ----                   -------
  Normal  SuccessfulCreate  88s   replicaset-controller  Created pod: hello-world-6cc5659cb7-gd7vn
  Normal  SuccessfulCreate  88s   replicaset-controller  Created pod: hello-world-6cc5659cb7-2vclw
  Normal  SuccessfulCreate  88s   replicaset-controller  Created pod: hello-world-6cc5659cb7-r77wj
  Normal  SuccessfulCreate  88s   replicaset-controller  Created pod: hello-world-6cc5659cb7-g7mvk
  Normal  SuccessfulCreate  88s   replicaset-controller  Created pod: hello-world-6cc5659cb7-2bdcr
We can see that now the application is running on the cluster, but how can we access it? The following is the final step
3.4. Create a Service object that exposes the deployment:
kubectl expose deployment hello-world --type=LoadBalancer --name=hello-world-service -n myspace
We can now see the creation result on Rancher:
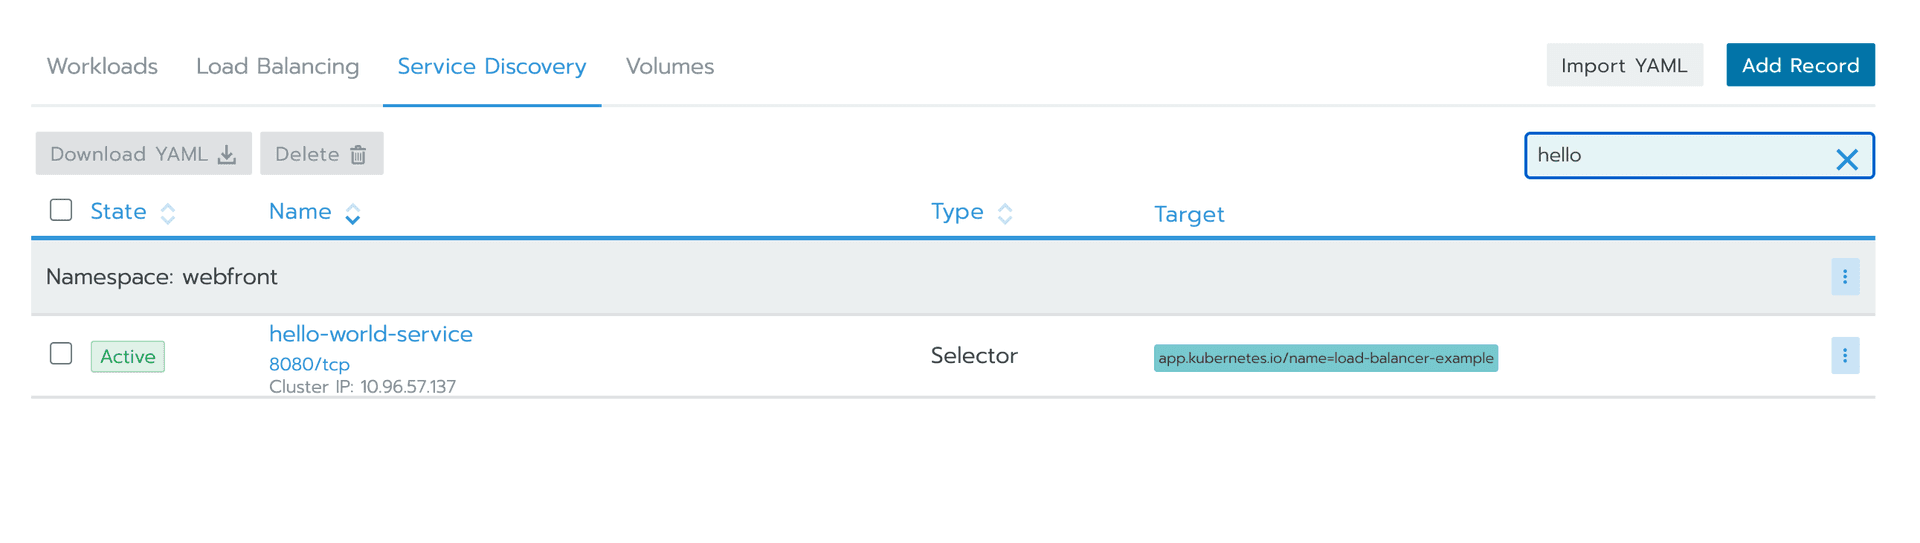
Now let's display information about the Service
kubectl get services hello-world-service -n myspaceYou might see the following information, please note that the IP here is just an example, not a real IP:
  # The output is similar to:
    NAME                  TYPE           CLUSTER-IP     EXTERNAL-IP      PORT(S)          AGE
    hello-world-service   LoadBalancer   10.97.56.136   10.234.204.239   8080:30533/TCP   24s
Make a note of the external IP address (LoadBalancer Ingress) exposed by your service. In this example, the external IP address is 10.234.204.239 Also note the value of Port and NodePort. In this example, the Port is 8080 and the NodePort is 30533.
now you can run your application 🎉
Use the external IP address (LoadBalancer Ingress) to access the Hello World application:
curl http://10.234.204.239:8080
The response to a successful request is a hello message:

🎉 Congratulations! You've successfully deployed your first application using kubectl.
In conclusion, I hope that after reading this article, you will have a better understanding of K8s, and be able to contribute more cool features to your team. I also started from scratch and gradually became a CI tinker, Keep learning, keep growing, and keep coding!